Configure Launch
To create a launch for an EnCap, click the EnCap name for which you want to create the launch and follow the steps below:
1. You will find the history of existing launches for the selected EnCap in Launch History page. Click  to alter the launch configuration and
  to delete the selected launch.
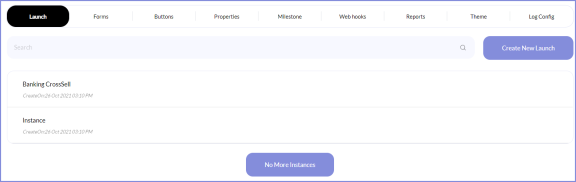
2. If you want to create a new a new launch for the selected EnCap, Click Create Launch button. For example, if you want to launch the BookStore EnCap, select the Book Store EnCap and click Create Launch button.

Info! If you don't have any other launches for the selected EnCap, you can also create the launch by clicking "Create Launch" in the message Create your first Launch "Create Launch"
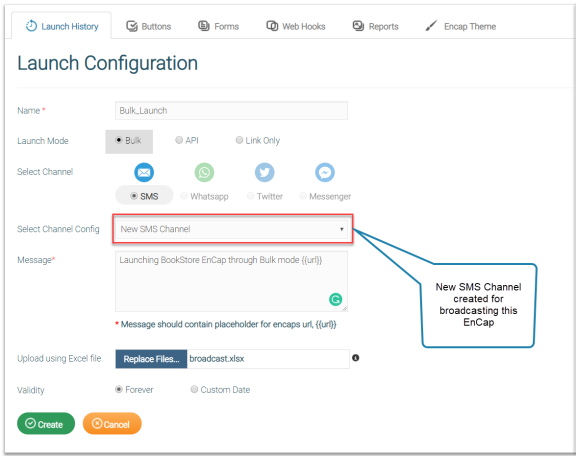
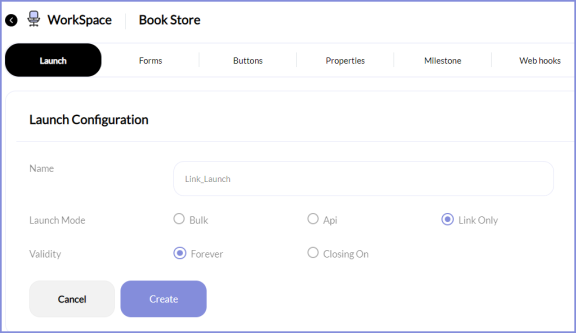
3. This will open Launch Configuration page. Configure the new launch in this page by giving the following inputs.
4. Enter the Name for the new launch.
5. You can launch your EnCap by selecting any one of the three modes namely Bulk, API, and Link Only from Launch Mode.
6. Choose the broadcasting medium from the list of available channels to promote the selected EnCap launch from Select Channel option. You can select either SMS, WhatsApp, Twitter, or Messenger option.
Info! SMS channel is available in the current version of Twixor EnCaps
7. Select the appropriate channel configuration from Select Channel Config. New channels can be configured by creating new channel in Channel page that will be illustrated in the Create Channel guide.
8. Enter the introduction message for the EnCap in Message in the format Your Welcome Message {{url}}.
Info! {{url}} is the placeholder for the EnCap URL
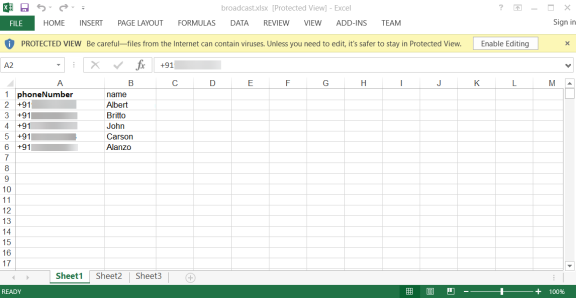
9. You can upload the list of customer details through an Excel file using Upload using Excel File option. The Excel file must contain the customer details like Customer Name, Customer Mobile Number, Address, etc.
Info! Upload using Excel file option will be enabled only in Bulk mode. And, the Excel file should contain phoneNumber as the mandatory column
10. Pick the expiry date of the EnCap from Validity.
- Choose Forever for never ending EnCaps.
- Select the Custom Date option to choose expiry date of the EnCaps from Expiry Date.
11. Finally, click Create to configure the launch.
Launching the EnCap through Bulk Mode
If you want to send the EnCaps to a group of customers, you can use Bulk mode. Give the inputs in the appropriate columns.
Broadcast.xlsx file is uploaded to send the selected Launch to a bulk of customers. The Broadcast Excel file contains the phone number of the customers to whom the EnCaps are to be sent.
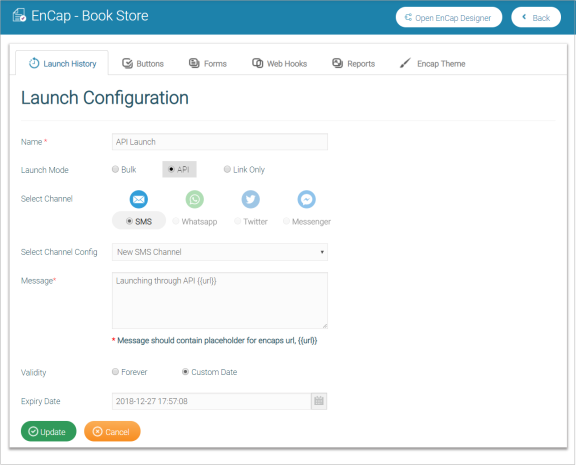
Launching the EnCap through API Mode
With this mode, you can automatically send one EnCap to many persons rapidly responding to an API call. Launch configuration using API mode can be shown in the figure below:
Launching the EnCap as Link
You can send the EnCap as a Link using this mode.
Status of Launched EnCaps
In the right side of the Launch Configuration page, status of the instance will be shown.
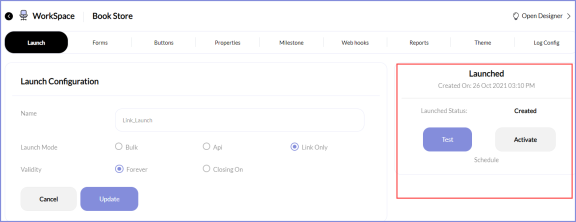
It displays the following information:
- Total number of Launched instances.
- Total number of messages sent in Total Message.
- Date on which the launch was created in Created on.
- Current status of the instance in Instance Status. It can be either Created, Started, or Stopped.
Testing the Launch Configuration
Prior to launching the EnCaps, you can test it here for any errors.
For testing Bulk and API Launch
1. Click Test button.
2. Select the Single Number tab if you want to send the EnCap SMS to a single mobile number. Enter the test Phone number to be which the EnCap is to be sent.
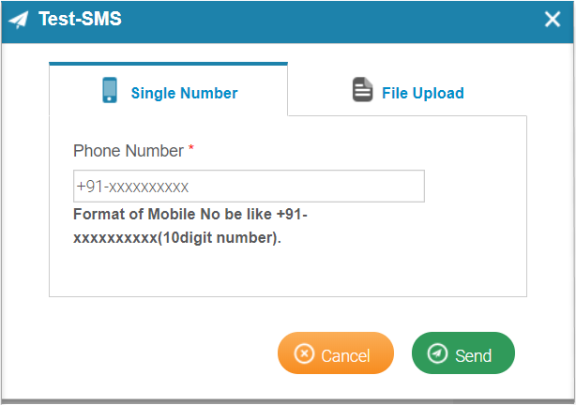
Info! The Phone Number should be +91-xxxxxxxxxx(10digit number)
3. Click File Upload to test the launch by sending Bulk SMS. Click Add File to upload the excel file containing customer details.
4. Click Send to send the created launch to a single number or a group of numbers.
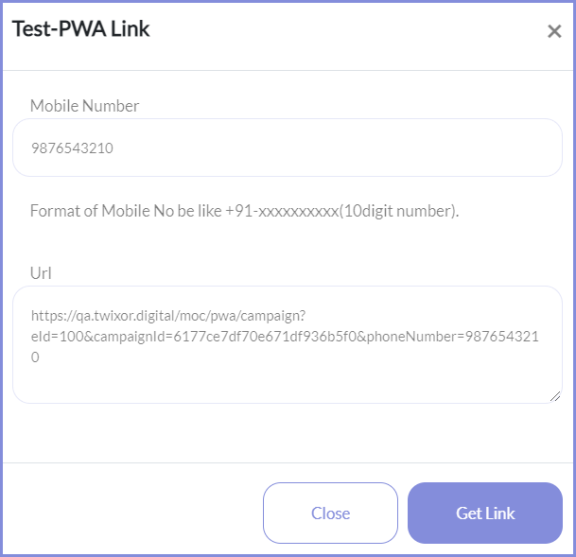
For Testing PWA Link
1. Click Test button.
2. Select the Single Number tab if you want to send the PWA link to a single mobile number. Enter the test Phone number to be which the EnCap link is to be sent.
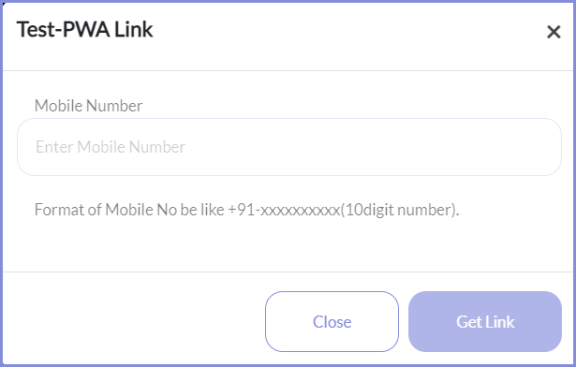
3. Click Generate Url to generate the test URL for Link Only Launch Mode. You can check this URL in any of your devices.
The Url is generated as shown below:
Passing Parameters in URL
Twixor EnCaps also allows you to pass the additional text and numeric parameters in the URL that can be referred anywhere in your EnCap flow.
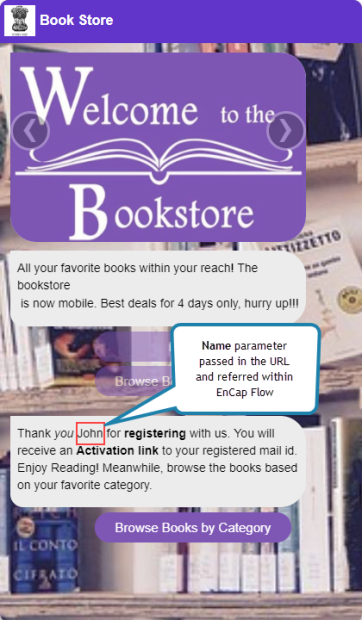
For an example, let us pass the name parameter in the generated URL as given below:
https://aim.twixor.com/pwa/campaign?eId=103&campaignId=5bfbe8e6f5c0ae73cfefdd&phoneNumber=1234567891&name=John
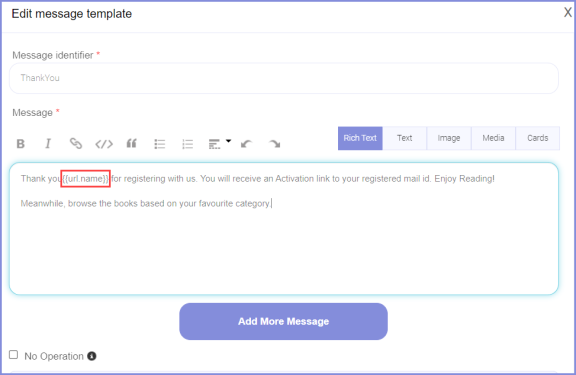
This parameter can be given in the {{URL.ParameterName}} format in order to access it in the EnCap flow.
In this example, the name parameter can be used in the Thank You message template that we have used in the Book Store EnCap flow as shown below:
Below shown is the output launch after passing the name parameter in the URL.
You can also have the option to pass the numerical parameter in the URL.
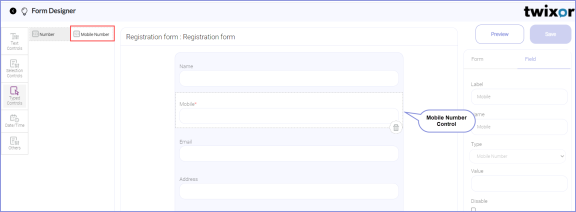
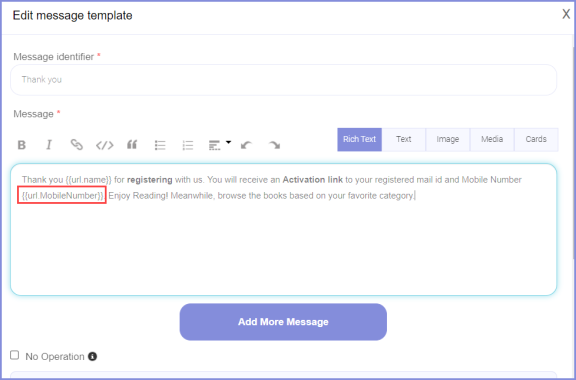
In another example given below, MobileNumber can also be passed and made to display in the thank you message displayed after the registration.
Mobile Number control is used in the registration form as shown below:
In the Thank You message template, refer the Mobile Number parameter in the same way as we already did using the Name parameter in the Thank You message.
Pass the Mobile Number parameter in the link as given below:
https://aim.twixor.com/pwa/campaign?eId=103&campaignId=5c176dd82cf01e93e3ea1612&phoneNumber=%2b91-123456789&name=John&Mobile Number=123456789
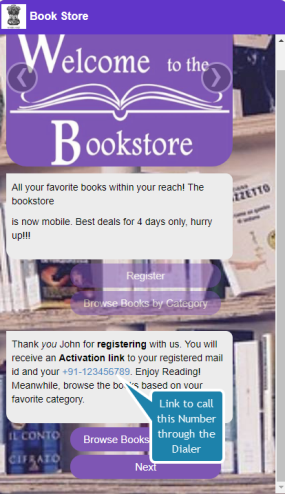
Now, let's view the thank you message in the output launch after passing the Name and Mobile Number parameters below.

If you want to open the dialer for the phone number displayed on the EnCap message, insert a link for the mobile number using tel.
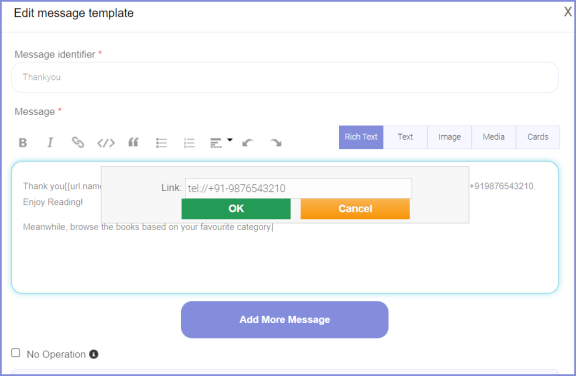
Output Launch after giving the link to mobile number look like this:
You can program the starting date for the launch. Click Schedule option and select the beginning date.
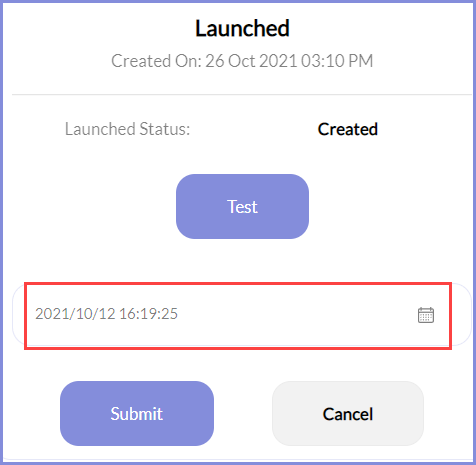
Then click Submit to start the launch on that specified date.
Activating the Launch
Finally, after finishing all the modifications, spark off the created launch by clicking Activate button. This will open a dialog box "Activate EnCap".
Click Activate to activate the launch.
Info! You will view a message "Success! Launch Campaign" if the EnCap is launched successfully
The activated Book Store EnCap is shown in the video below:
Stopping the Launch
EnCaps whose validity period set as Forever will be active all time. Select the Custom Date option to choose expiry date of the EnCaps from Expiry Date.
Info! The EnCap launch remaining forever can be made to expire by changing its validity using Custom Date option
